home about diy fashion sponsor

Monday, April 29, 2013

Life Lately: April 29th

It's been about a month now that I've been out of school. At least once a day, someone asks me what I'm doing now that I'm graduated well, here's a few pictures so you can see for yourself:

There is not much that you can change about an apartment so I have turned to tackling the balcony. These little babies are for my herb garden
I chose morning glories to wrap around the railing (above) and zinnias for a hanging basket that's really a kitchen strainer (below).

I've started volunteering at Common Threads Farm doing chores in the evenings. This weekend I went to the Farmer's Market to help children paint bee boxes.

My diploma came in the mail!

From the interwebs:
Via
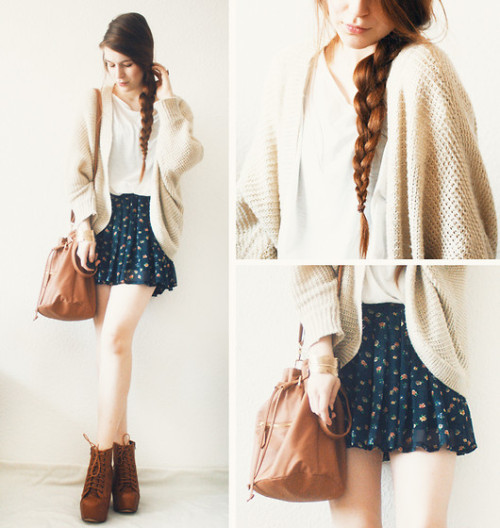
outfit envy Via
Via
I can't stop looking at pictures of this place. Via
NEED to learn to make these. Via
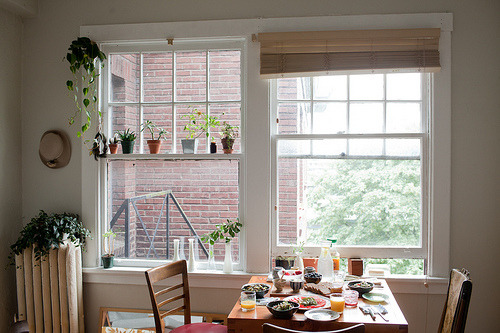
Kitchen envy.  Via

Watch this:

Read this:

Google, for example, says that its legendary free meals are meant to keep people happy and healthy over the long haul—and, of course, working longer at Google. Meanwhile, the setting, with tables for seven to eight as opposed to 40, is intended to provide the right climate for offhand brilliance. “The cafeterias are designed to make food social rather than fast,” says Jennifer Kokowski, who is one of Google’s in-house social scientists and studies the company’s food programs. “We recognize that innovation requires serendipity, and the lunchroom is the best place for that.
What Google’s cafeterias can teach us about school lunches 

Listen to this:


Don't forget to:
Via
XOXO,

Friday, April 26, 2013

Nightgown Refashion

This is an old project but I never did a proper post about it so here it is:


I picked up this vintage nightgown from the Goodwill Bins (did you know that you can buy things from Goodwill by the pound?!?!?!) several years ago and just got around to remaking it last summer (note my fourth of July nails and pink/blue dip dyed hair). The fabric wasn't right for a dress so I stayed with the theme and turned it into a cute sleep set of tank top and bloomers.


The top I made by simply cutting the top, sewing the sides and finishing the armholes with bias tape made from the sleeves (sorry I forgot to put that in the diagram). The skirt was just enough fabric to make bloomers using this free pattern by Coletterie.  You just print the pattern out on a normal printer and tape all the pieces together.  I typically hate to use patterns but this worked out quite well.  Sometimes it is nice to have someone telling you what to do instead of just guessing all the time.

I loved the detail on the top

I usually just wear a t-shirt and yoga pants to bed, but this pj set is perfect for hot summer nights and super adorable.

Stay crafty,

Friday, April 19, 2013

Refashion Inspiration

Last Saturday, I took a trip to my favorite thrift store. I spent only $20 (cue music) and got two shirts, one sweater, one dress, one pair of shorts, 5 forks and spoons for my wind chime and a strainer (see why it's my favorite store?!?)


I got this XL poka dot denim shirt for $3 that I am really excited about refashioning

 Here are some of my ideas for it from images I hunted up from around the internet.
Can't wait to show you guys the results!


Thursday, April 18, 2013

Afghan update

Since I spent my spring break driving from Canada to L.A. and back, I had quite a bit of time to work on crochet squares for the afghan that I am making.  I brought a ton of yarn with me but somehow I only made four squares. I always seem to plan to do a bunch of things during car rides. I pack books and crafts and my journal but then I just end up falling asleep. I guess I am like a baby that way, put me in the car and I'll fall right to sleep!

Here is the four that I made on my trip:

I picked some squares that were pretty challenging for me. I have never made three-dimensional motifs before

or bobbles

but I learned how from the book that I borrowed from my friend Laura.  Since I was on the road I couldn't look up patterns online and I didn't want to print them out beforehand, I figured a book was the best way to go and so far I really love all the patterns in this one (no errors like the book I was using before).


XOXO,

Monday, April 15, 2013

Make it Monday: Wind chime


A few days ago, I found this wind chime on Pinterest that I decided to try to recreate:


The original was created by http://blogesteix-chandeliers.blogspot.com/ who makes simply amazing chandeliers from repurposed materials. I believe she sells some of her creations but I found that it was quicker and less expensive to make my own. Plus it was a ton of fun!


The originals were hung from old cookie cutters, but I didn't have those so I used a canned chicken can. These are the supplies that I used but really you can add anything that you want. Look for things that would make a nice sound.  I happened to have some sea glass lying around that I thought would look pretty. 

For the width of my can I decided to use 4 utensils and four decorative strands. I gathered all the materials that I wanted to use and then used pliers, wire and split rings to create the four decorative strands below:


To hang these from the can, I first filled it with water and froze it overnight (the frozen water makes it easier to punch holes in the can without collapsing it on itself) then used a hammer and nail to punch eight evenly spaced holes on one edge of the can and four to hang it from on the other edge (I did not cut out that side because my can opener would have destroyed the edge). 


I tried to drill a hole through the sea glass but that was an epic failure so I ended up wrapping it in wire.

I am debating adding another can tier below that the forks and spoons would hit but I don't want to make it too loud as I live in an apartment complex and it does get very windy here.

Stay crafty,

Thursday, April 11, 2013

The "too much time on my hands" manicure

The weather has turned into a crazy mix of beautiful and sunny one minute and pouring rain pounding on the window panes the next.  But the sun that there has been, has gotten me into a spring mood.  This weekend I had three days off in a row, some of which I spent cleaning sails for projects, cleaning the faucet knobs, planning a patio garden and meticulously painting small flowers on my nails.


Two coats of grey, a matte topcoat, pink petals, green leaves and white dots for the center later and my fingertips are dressed for spring! I am in love with the matte polish trend but the downside is that it doesn't provide any protection and since I work in a marine supply store, they get chipped and dirty quickly.  Now that I am out of school and have more time, I am eager to dress more professionally and refine my personal style however, my current job makes that rather pointless. At work, I wear dirty ripped up jeans, a too big company t-shirt and sturdy shoes. I wash my hands constantly but still leave every day with dirt and grease all over. I don't mind getting dirty at all but it kinda bums me out when I wear the same clothes every day and  don't get the chance to wear clothes that are really "me". Hopefully, one day I will have a "big girl" job that allows me to dress the way that I want. For now, I'll take any chance that I get, even if it is just a few painted flowers.

Monday, April 8, 2013

Make It Monday: Floral Headband

I have had this project planned for a while but I wanted to get all the winter stuff out of the way. Since it is officially spring (you couldn't tell from the weather here right now), I think it's time to make a fun floral headband.


I found this ribbon at Joanns when I was there the other day and it just screamed "make me into a headband!". So I bought it. I don't think it is incredibly unique and shouldn't be too hard to find in your local craft store.


Supplies:
Scissors
Needle
Thread
1/4" elastic
Floral ribbon

Sunday, April 7, 2013

What I Wore: Graduation brunch

Today, I put together an outfit with the dress I received from Modcloth stylish surprise that I talked about here. Yesterday, I spent the afternoon taking in the sides of the top because it was just too loose for my liking.  Since it was cold and rainy, I chose to pair it with tights and a sweater. I can't wait until it is nice enough to wear it sans tights with flats.

dress: Modcloth/shoes: Modcloth/sweater: H&M
After church, my friends met me at one of my favorite restaurants in Bellingham, Mount Bakery (for those of you who are not familiar with the area, the nearest mountain is Mt. Baker, get it?). Because stuffing myself with savory crepe of sausage, eggs, caramelized onions and cream wasn't enough, we ate the honey and lavender cupcakes that Kirsten made once we got home. The official reason for all this festivity was my recent graduation. In all the flurry of finals and leaving for Spring break, we never got to really celebrate.

When we showed up the restaurant, we realized that we had all coincidently worn the same colors, so we decided to take "family" pictures.
The Nook family
Same colors!
I hope you all had a lovely weekend!


*All pictures taken by Kirsten Schnell

Saturday, April 6, 2013

Spring Break in California

As mentioned before, I went on a road trip to California with my roommates for Spring break (graduation trip for me!). Here are the promised photos:

Kaylin and I in the car that we lived out of for 11 days

Friday, April 5, 2013

Spring Wish List

When I left for spring break, it was snowing here but the sunny weather in California got me craving these spring styles:

1. I don't have a single full length skirt in my closet and I think this one from Modcloth would do nicely.
2. I've been dying to jump on the high-low skirt trend but I'm not sure it would work as well in windy, rainy Bellingham as it does in sunny California
3. We stopped by the Fossil store inside the Dolby Theater in LA and now I cant' stop thinking about these teal watches.
4. This pretty pink color by Essie is so perfect for spring.
5. I had so much fun watching all the sailboats in San Fran.  Once I get a big-girl job I'd love to splurge on some Sperry's.

Monday, April 1, 2013

Modcloth Stylish Surprise

Before I left for my trip, my roommates and I ordered items from Modcloth Stylish Surprise.  If you don't know what that is, at the end of each season the clothing site Modcloth purges their stock by offering a batch of items for $15 each no matter what the original cost was. The catch is that you can order your size but the item that you get is a complete surprise. Anyway, the package came while we were gone and was being held at the post office until we were able to pick it up today. Here is what I received:

Sorry I don't have any pictures of me wearing it. I still need to figure out how to style it and what undergarments to wear because it is sheer on top.  I found this picture of it on another site but as you can see from my pictures it is a bit more greenish. I found that the dress was called the "Dance Lessons" dress on Modcloth and I'm not sure what they sold it for but it was $92 from the designer so I think I got a great deal!


I love the color and lace but it is a tad bit big. I ordered a XS but according to the webpage of the designer their smallest size is a 4 which is bigger than I normally wear so I might take in the sides before I wear it.

This was my second time trying Modcloth Stylish Surprise and it is pretty fun even if you don't get amazing items. I might try to sell the dress that I got last time. Has anyone else tried the stylish surprise?

XOXO,


P.S. My roommate is currently sorting our pictures from the trip so they will be coming soon!
Related Posts Plugin for WordPress, Blogger...